Creating Your First RAM folder
Every RAM folder in RAM Folder is tied to an ordinary folder on your SSD — its backing folder. That folder is where your files rest while the disk is unmounted, and where saved contents are written. Creating a disk comes down to a couple of choices: which folder and how big, plus an optional name. This page walks through them, then creates the disk.
1. Choose a folder
Every disk needs a backing folder, and there are two ways to pick one.
Method 1 — drag & drop. Drag any folder from Finder straight onto the RAM Folder window. That folder becomes the new disk’s mount point and backing folder in a single step.
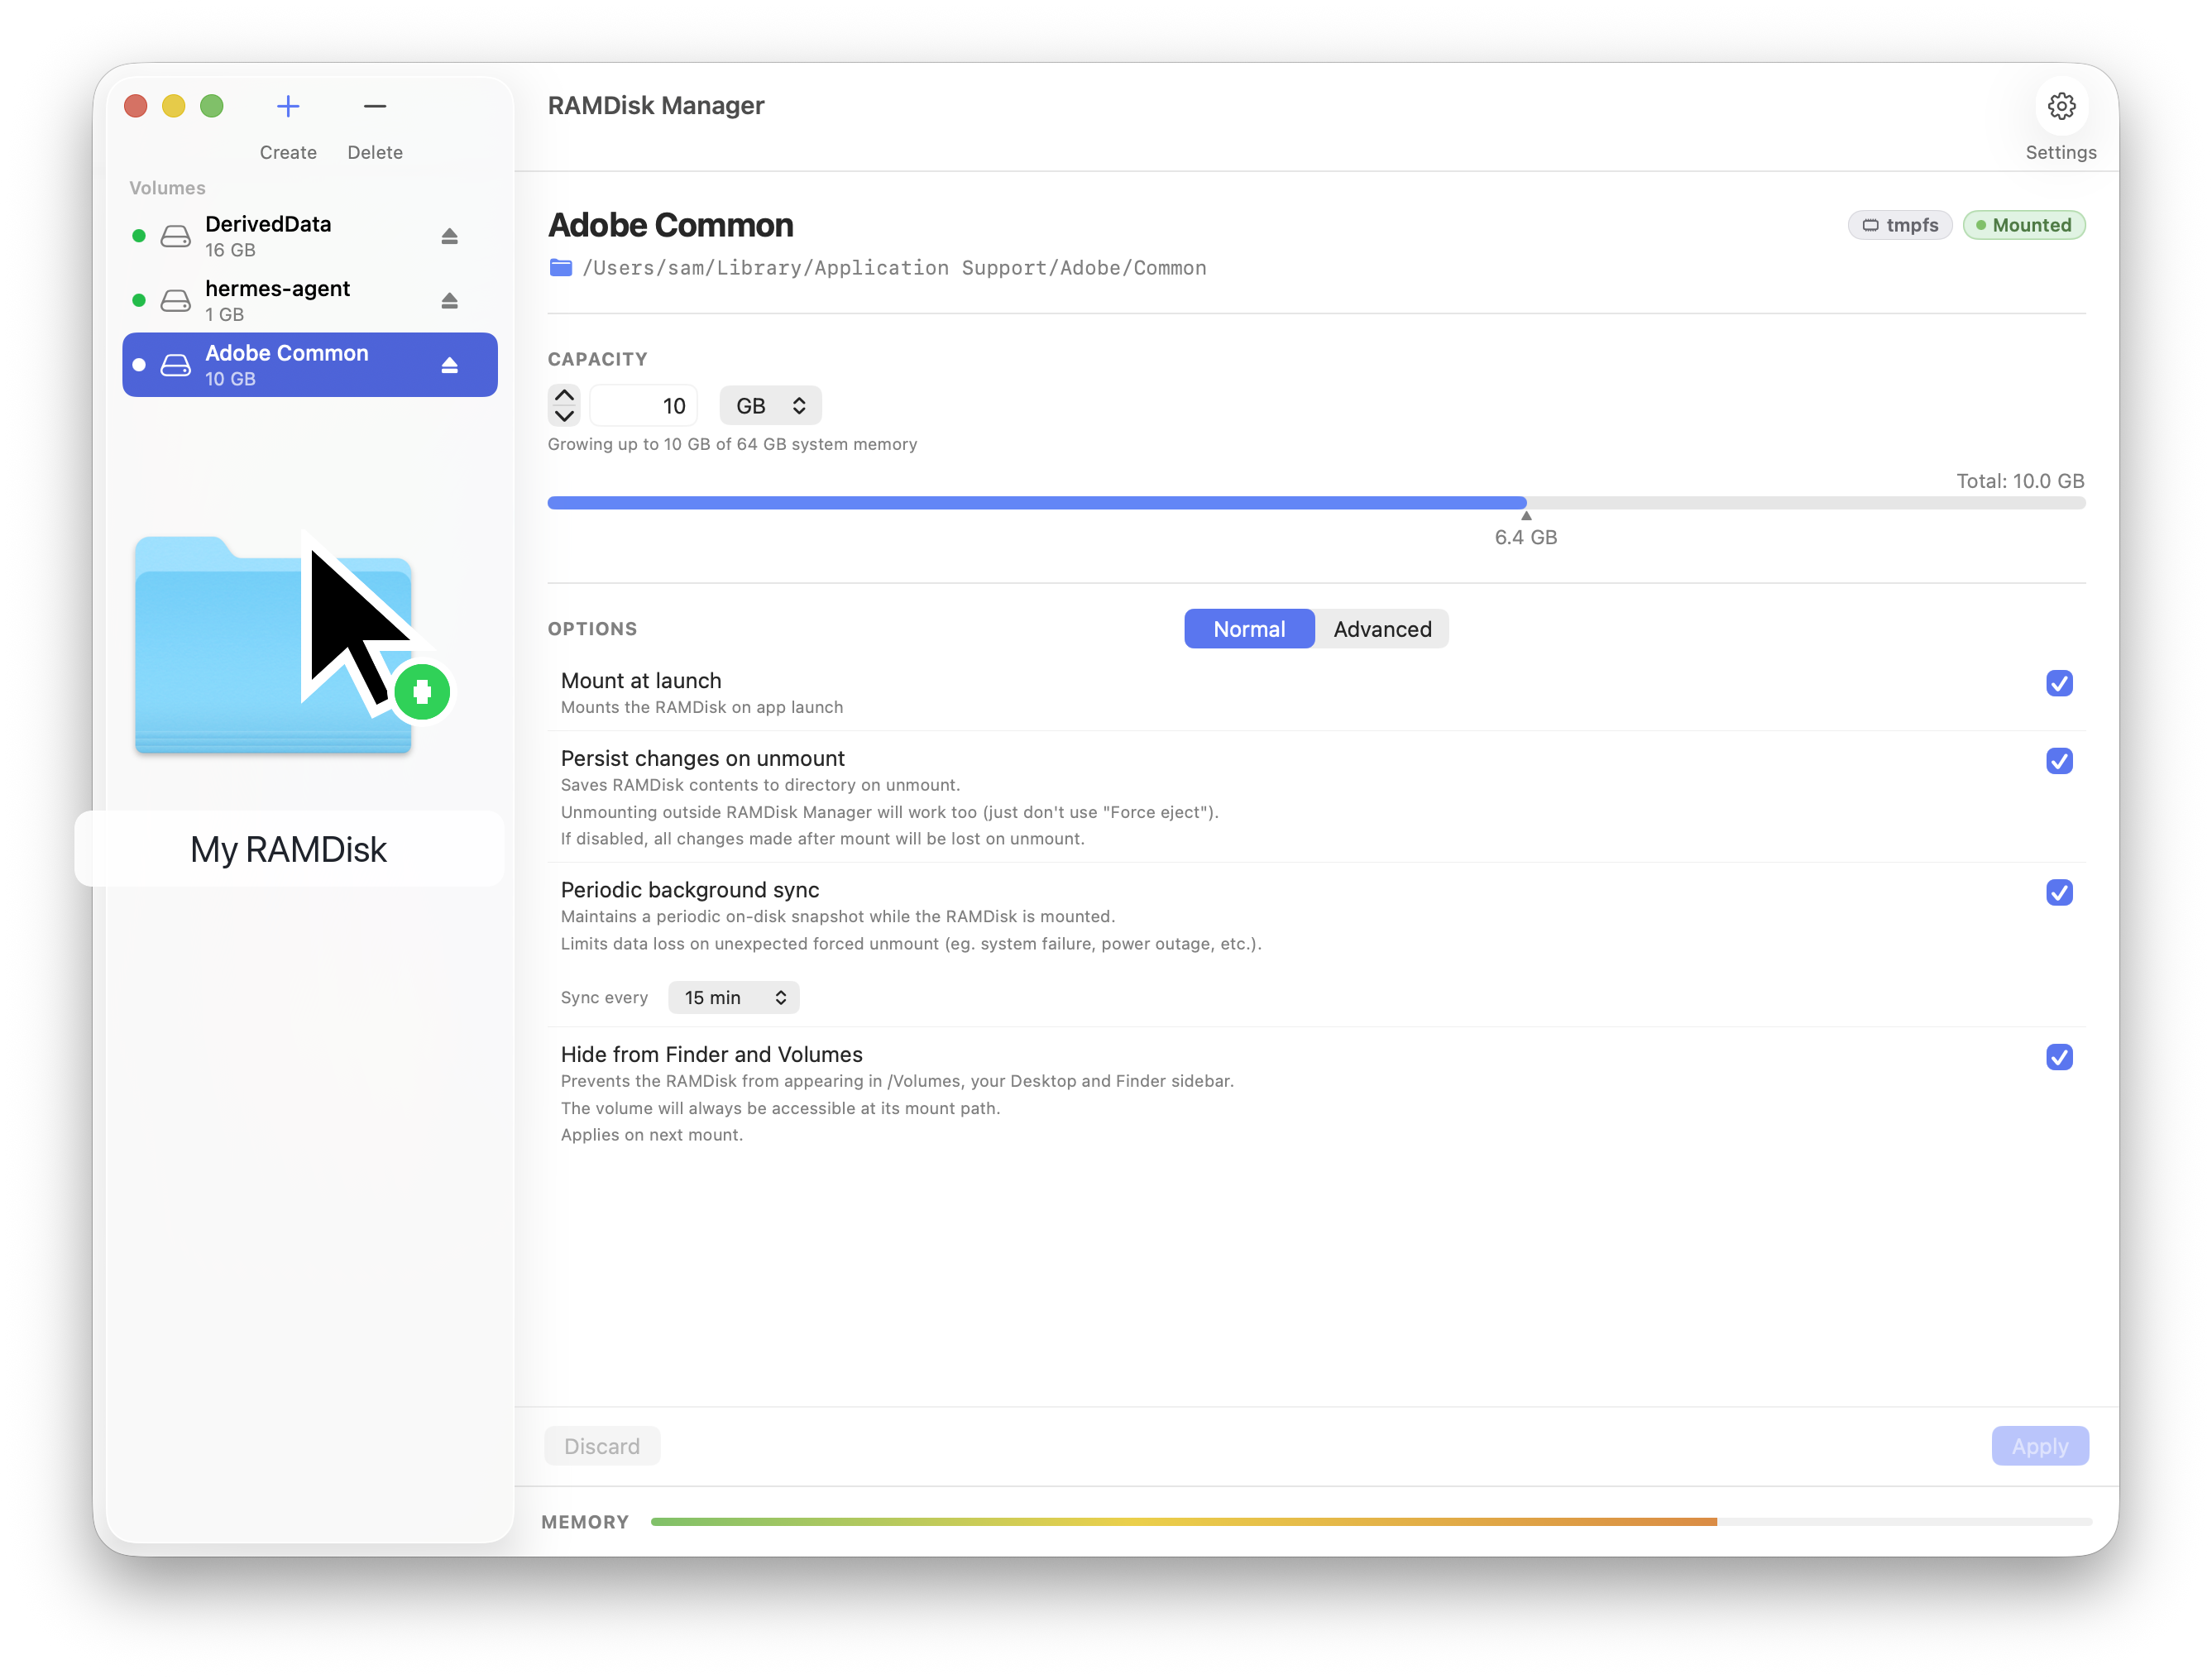
Method 1: drop a folder — here “My RAM folder” — anywhere on the window to turn it into a disk.
Method 2 — the New RAM folder sheet. Click
+ Create in the toolbar (top-left). In the
sheet that opens, click Choose… next to Mount
at and select a folder. You can also give the disk an optional
custom name and set its size from the same sheet. Names must be unique
across your RAM folders (the app pre-fills a numbered suffix if one is
already taken).
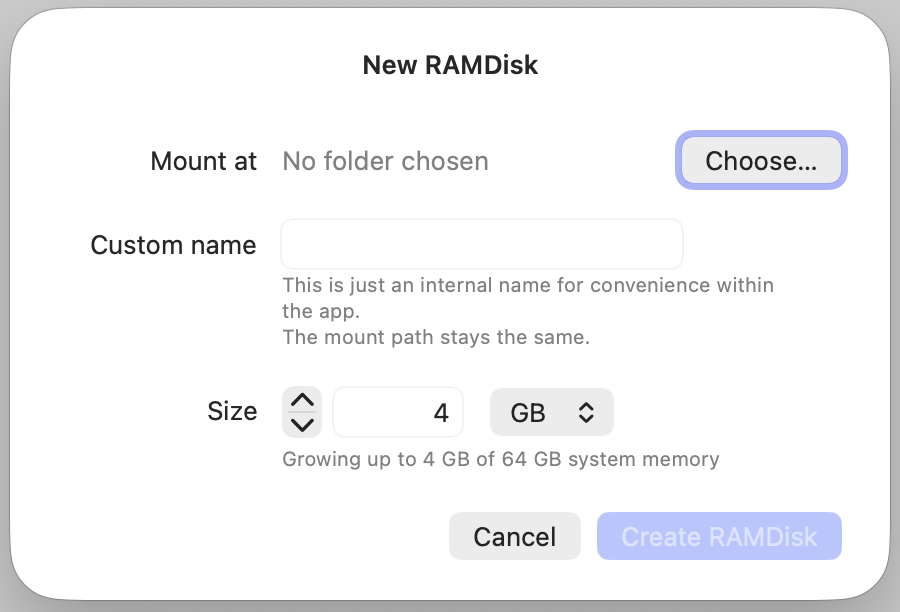
Method 2: in the New RAM folder sheet, click Choose… to pick the folder.
Either way, the folder you pick becomes the disk’s mount point and its backing folder. While the disk is mounted, that path shows the copy living in RAM; while it is unmounted, the same path shows the real folder on your SSD. Pick an existing folder to have its current contents loaded into RAM on the first mount, or an empty one to start clean. The full model is explained in Synchronization.
2. Choose a size
Set a size in the sheet’s Size field and pick a unit (MB or GB). This number is a ceiling, not a reservation: the disk grows with usage up to the size you set — a 10 GB disk holding 2 GB of files uses roughly 2 GB of RAM, not 10. The sheet spells this out, e.g. “Growing up to 10 GB of 16 GB system memory.”
The size is not permanent: you can change it later, as described in RAM Folder configuration. Choosing a ceiling higher than your free RAM is allowed but risky — see Memory & sizing for how much RAM a disk really costs and what happens if it fills.
3. Create the disk
Click Create RAM folder at the bottom of the sheet. The disk is created and mounted straight away: it appears in the Volumes list on the left with a green “mounted” dot, and its path is instantly usable in Finder and the Terminal.
Select the new disk in that sidebar and its Detail View opens on the right — its capacity, the Memory Gauge, and the set of options that tune how the disk behaves. Those are covered in RAM Folder configuration.
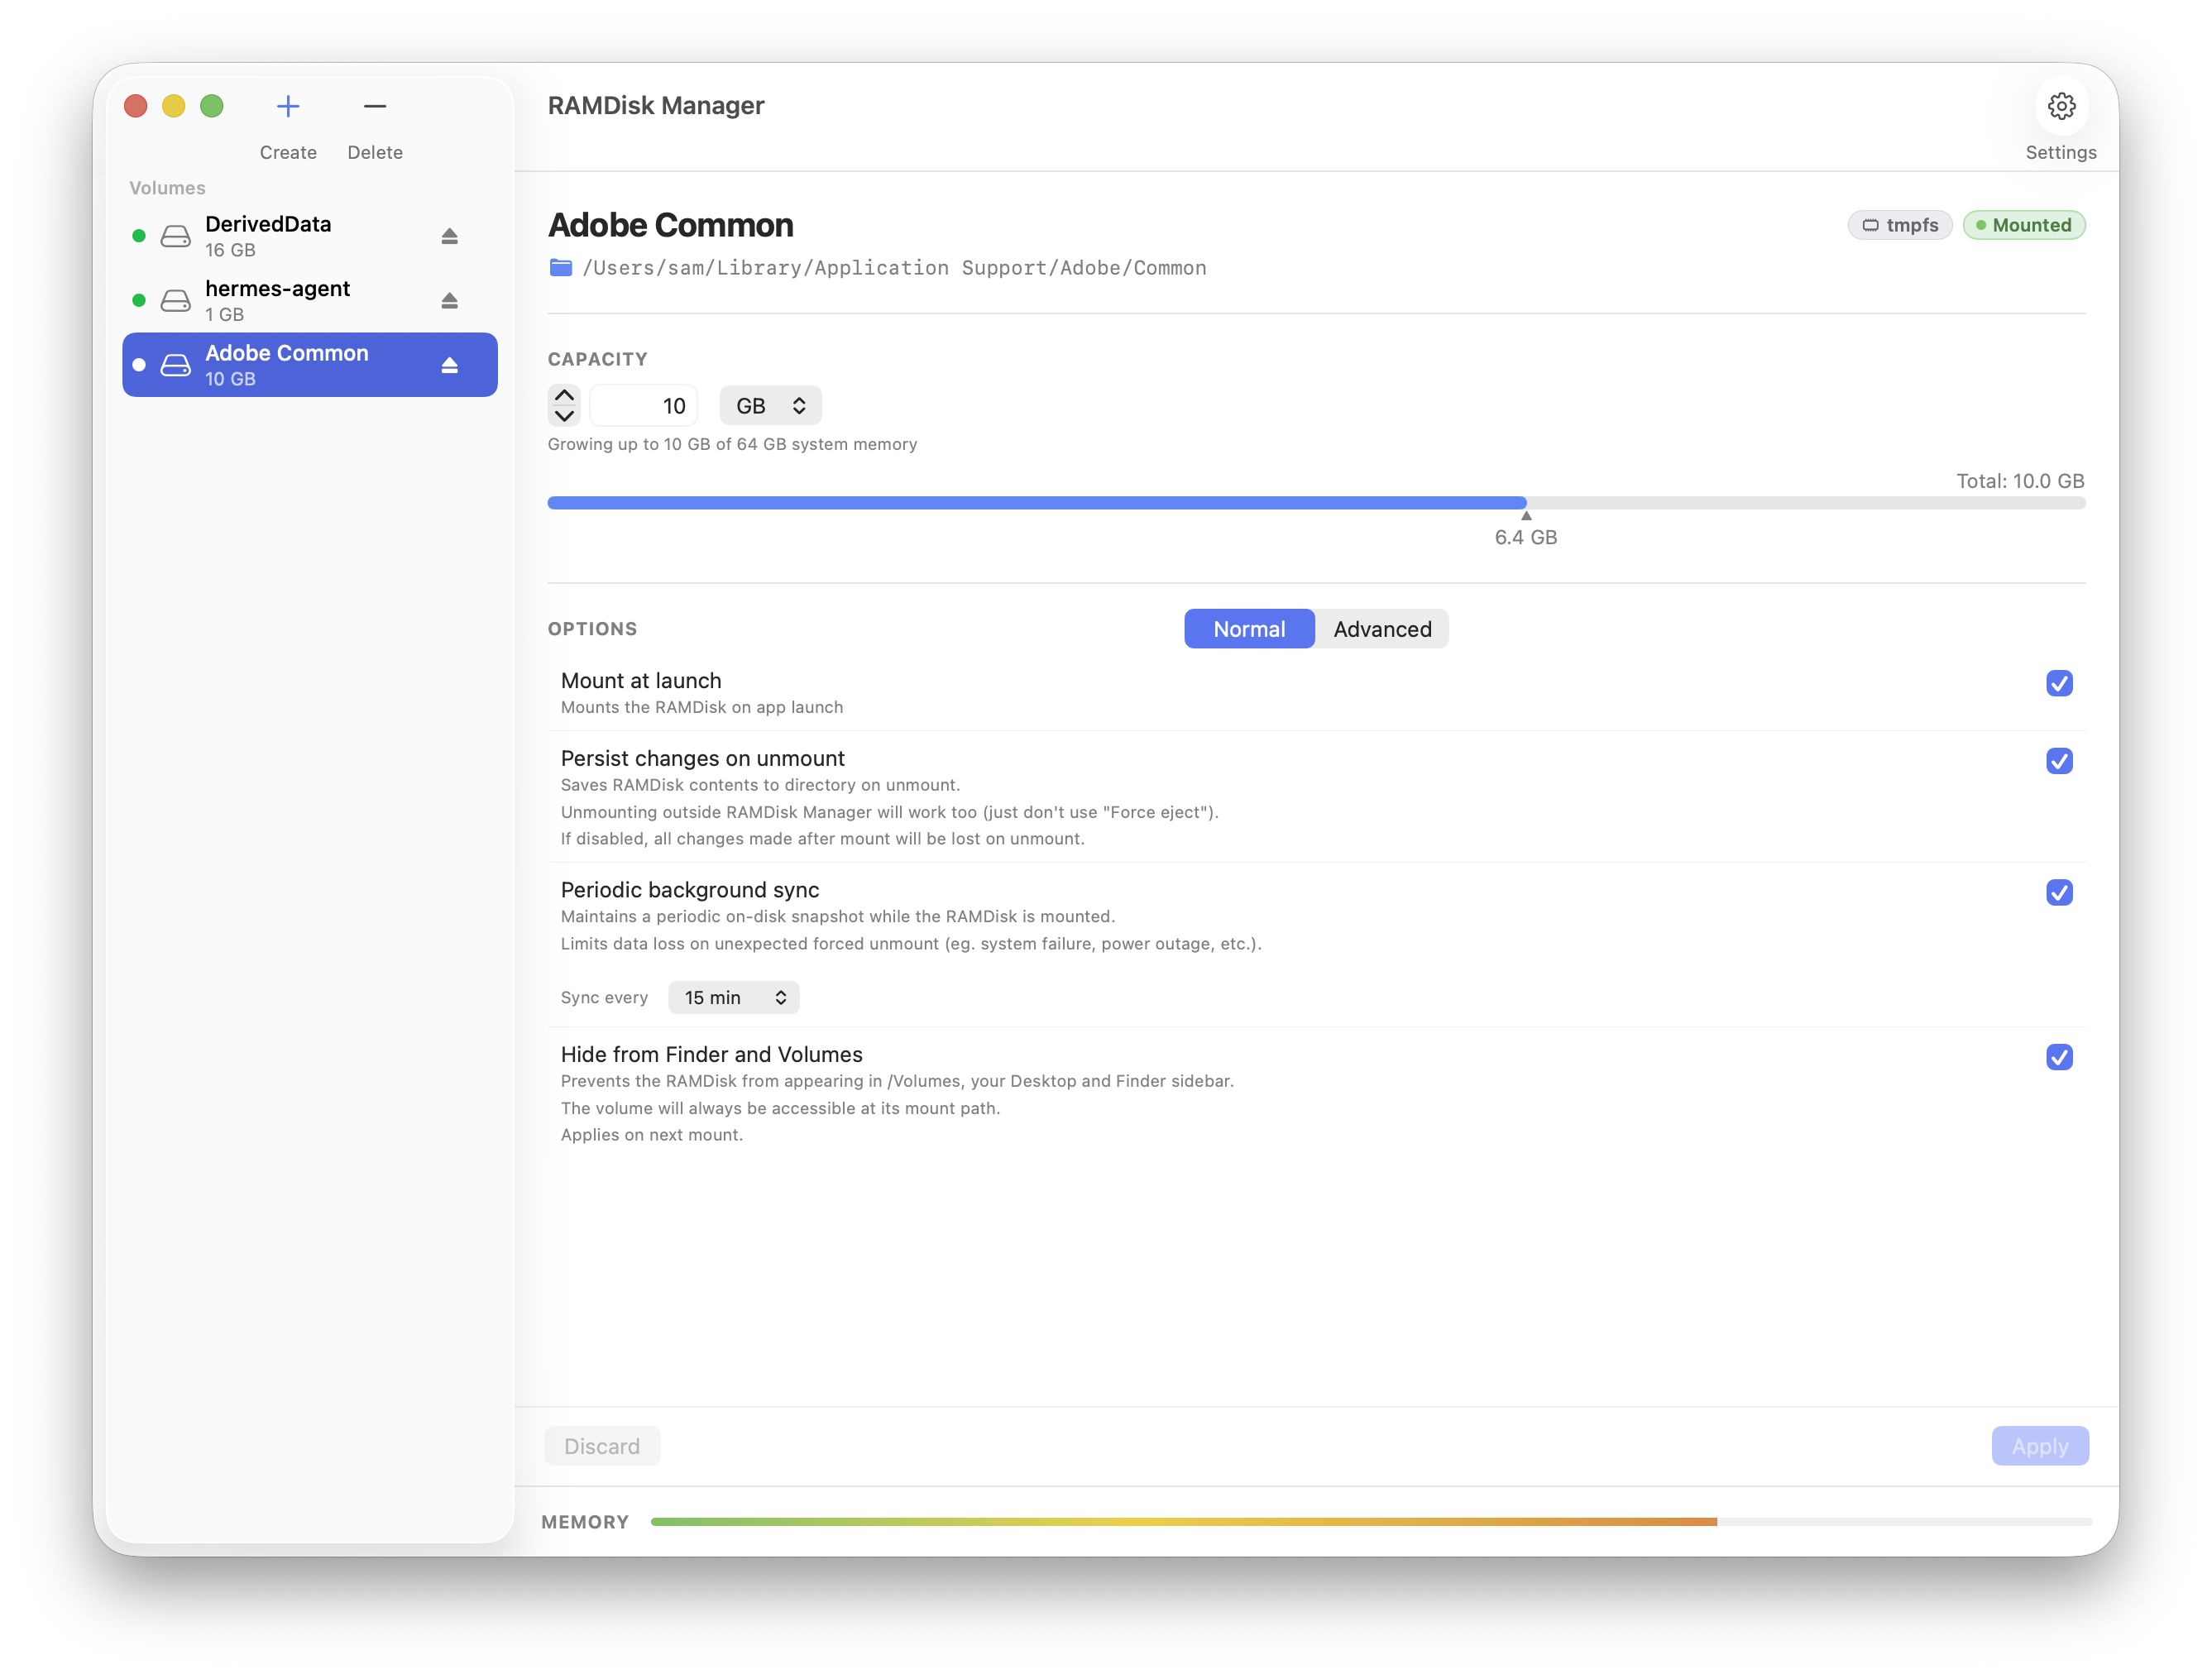
Selecting the new disk in the sidebar reveals its capacity, the Memory Gauge, and its options in the Detail View.
That’s a working RAM folder. To tune how it behaves, continue to RAM Folder configuration. One page worth reading next: Synchronization, which explains how RAM Folder can make any folder into a RAM folder, then back to a normal folder while preserving the data.